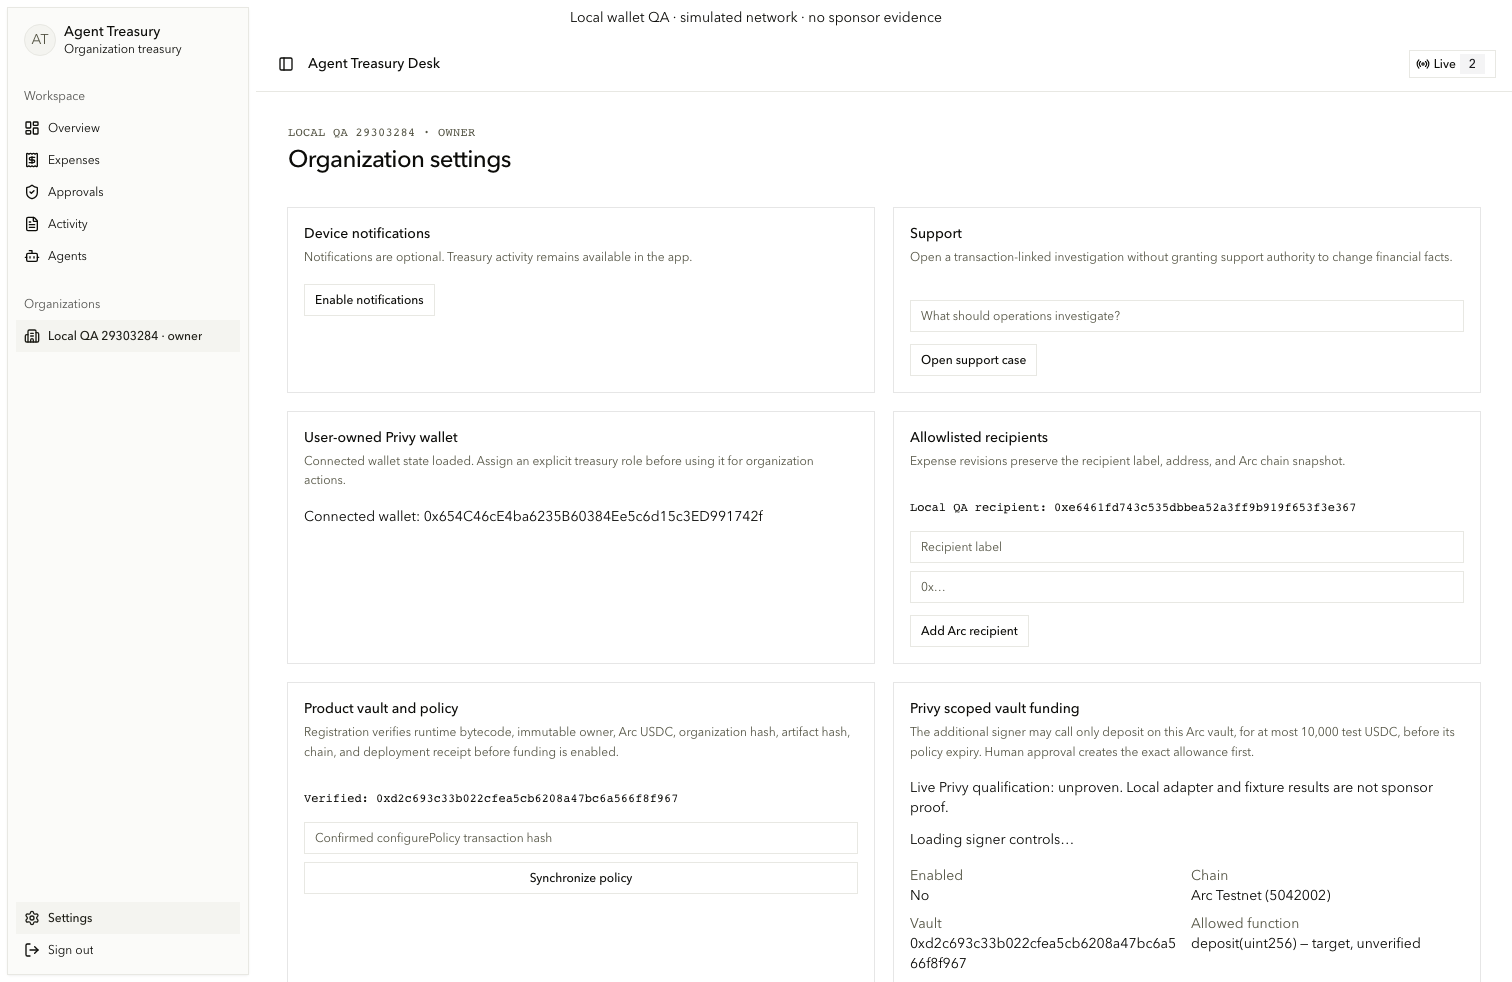
Settings, wallets, and members
Configure the vault boundary, wallet controls, recipients, invitations, support, and notifications.
Configure organization controls
Settings exposes owner actions without moving provider or financial authority into the browser.
Register and synchronize the vault
In vault-configuration, enter the sanitized deployment values and choose Register verified vault (vault-register). The API verifies chain, owner, token, organization hash, artifact, receipt, and bytecode. Enter a confirmed policy transaction in vault.policy-transaction, then choose Synchronize policy (vault.policy-sync).
Provision the Privy wallet boundary
Use Create wallet (privy.wallet.create) when no eligible wallet exists. Review privy.signer.summary, refresh with privy.refresh, and attach only the scoped deposit(uint256) signer using privy.signer.attach.
Fund or prove denial
Enter a funding amount within the provider-verified ceiling. Approve and deposit (privy.funding.deposit) records the exact owner-selected allowance and narrow delegated deposit. Prove withdrawal denied (privy.funding.denial) qualifies only when the provider returns an explicit policy violation. Interrupted intents reconcile their recorded transaction before any retry.
Manage people and recipients
Create role-specific invitations (invite-[role]), copy active invitations (copy-invitation), or revoke them (revoke-invitation). Add a labeled Arc recipient with recipient.label, recipient.address, and recipient.add.
Support, notifications, and recovery
Open a support case with support.subject and support.open. Enable notifications only through the user gesture. Protected wallet export and recovery require fresh provider authentication and must never be captured.